

#JumpingintoJune
Check out all the lovely jumpsuits here!
Perfecting the lycra crop top…
As you’ll be aware from my previous post I bought a large amount of lycra from eBay. I then started sewing it…
Turns out that 11kg of lycra goes a LONG WAY! especially if you’re making crop tops and hotpants! I could have posted all my attempts in different posts, but there’s only so many shots of my chest that everyone needs to see. Instead, I’ve waited until I’ve perfected (almost) my pattern.

The original pattern
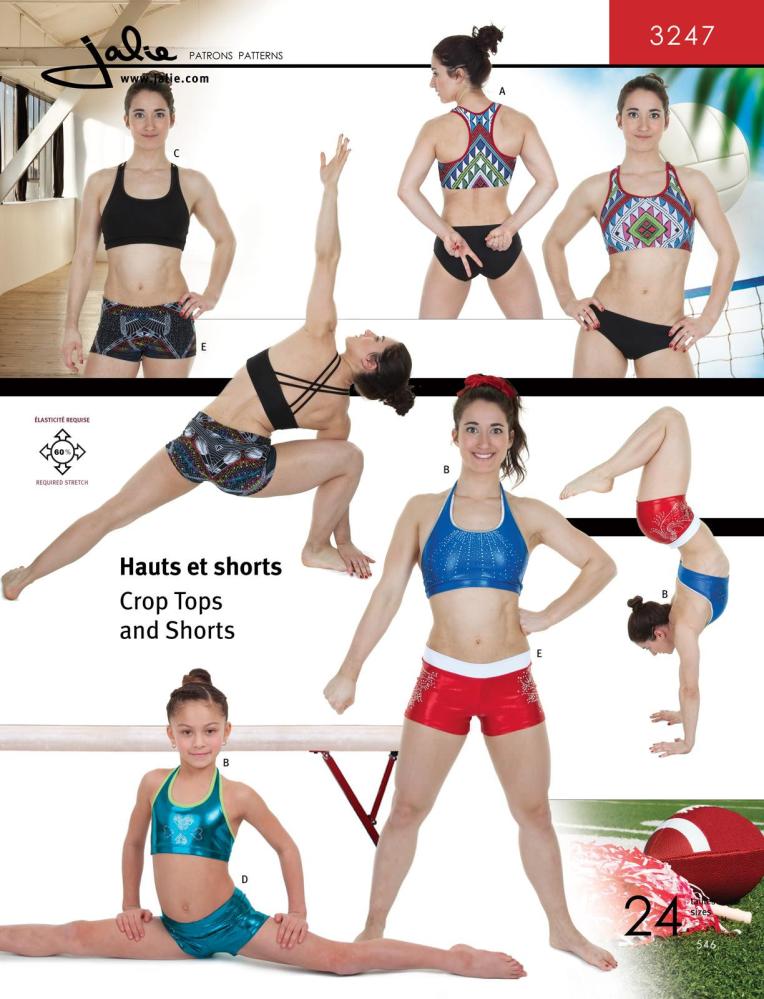
I started with Jalie 3247. This is a great pattern for a gymnast or dancer. I’m not either so there have been a few modifications.
1. The (not so) Big Top
This one reminds me of a circus…I used some fabric leftovers from my last aerial leotoard (red/white striped 10% lycra and some stretch mesh as lining) and some new fold-over-elastic that I bought from eBay in 4 colours.
I started by cutting according to my bust measurement – I never expected this to fit, but you have to start somewhere! I read reviews of the pattern to try and work out if it came up big or small, but decided to just go with the bust measurement one and adapt from there. Because the edges are all bound with fold-over-elastic, it’s really difficult to see the fit until the whole top is finished. So it looked as though this would fit until I tried it on.

About to join the circus…
It looks pretty good in the photo doesn’t it? I’m impressed. However…..

Lumpy Side Boob 😦
The pattern is clearly meant for dancers and gymnasts, not my rather over-sized chest! I’m falling out of the side and the elastic underneath my bust is a bit big. But my f-o-e sewing was pretty neat for a first attempt, so I’ll take that as a positive!
2. The Silver top
So clearly, I need some more space for the girls. This time, I cut the pattern according to my high bust measurement (approx. 2 sizes smaller) and made a full bust adjustment of 3/4″ I then added 1″ to the bottom (although I forgot to do this to the back piece, so it ended up as a bit of a bodge job where i trimmed down the side seam but kept the length in the middle)
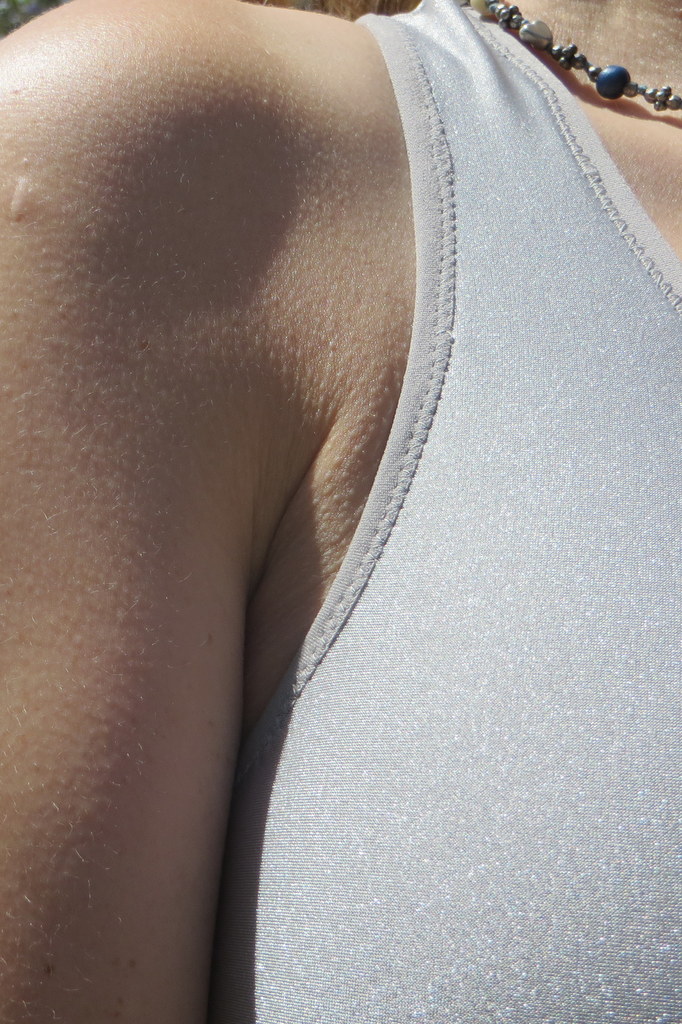
Not so lumpy side boob 🙂
Everything fitted much better this time as you can see! But I still felt a little constrained and decided to add another 1/4″ to the FBA on the next attempt.
3. The everyone loves turquoise top
I had no idea everyone loved this colour! I get the most complements on this top. This colour was part of my lycra box from Funkifabrics. It was a small offcut of a foiled piece, so I was using the not foiled edge to make the top. See how far a box of lycra goes? I chose to use my black f-o-e on this one as a contrast and I LOVE it! This one has the 1″ FBA which I’m still not sure gives me enough room.

From the Front

From the Back
I read something somewhere about using 2 layers of mesh to offer extra support – the first 2 tops definitely didn’t have enough support (there’s nothing more pathetic than running in a circle in warm up at the studio and having to hold my chest!) so I cut 2 pieces of mesh, one on the grain, one cross grain and used them as my lining. This does affect the amount of stretch it has though, so possibly affecting how much room I have. I also forgot to add any length to this when doing the FBA so this is probably affecting it too. The positive of this one though is that I get amazing cleavage!!!

Cleavage!
So onwards and upwards, I’m still not convinced that I have this pattern sorted. I want to add another inch to the length of my 1″ FBA pattern and see how that works because the silver one definitely has better length. I’m also going to single line the tops until I get the fit right because I’m adding in too many variables at the moment. Then once this is done, I can try out the different backs – I’ve also got ideas on adding a longer jersey or mesh piece to cover my stomach because I got a rotten friction burn from the hoop last time I wore the turquoise one.

French Gazelle action shot
New things I did:
1. Sewed a lot of crop tops
2. Used F-O-E
3. French Gazelle!!!
#JumpingintoJune – Jumping all the way to San Tropez
More on the jumping later….
So what’s this all about then? For those of you that haven’t seen Chris’ idea, check out this post – there are basically lots of talented ladies sewing jumpsuits in June, I mean, why not?
First I decided on my pattern, I was going to wing it, based on this inspiration:

Inspiration Jumpsuit
So the next thing was to order some material, my second online order ever…eeek. I wanted some lovely soft drapey black viscose jersey. I got exactly that from eBay, unfortunately it was rather thin, like, I can see through it thin. Which means other people will see through it and the world will see my pants (pet hate is seeing people’s pants through their trousers) Oh well, lucky I ordered loads, because I figured I’d just have to make the trouser part baggy and line the top part. I also bought some lovely patterned black and white viscose jersey in case I felt like making another one after jumpsuit 1. The patterned viscose was even more see through, like see every blemish on my skin through it, see through. No idea what I’ll do with it…..
This involved tracing a pattern from a pair of pyjama bottoms and draping the top on Gladys myself – Gladys enjoyed this because she’s spent the last few months a little naked.
Trousers cut, I decided they weren’t baggy enough. Top draped, I decided it wasn’t baggy enough. Too late on both fronts, I sewed it all together. The top was essentially a large rectangle, doubled over with a channel for the elastic sewn into the top. I used a 1 inch elastic because I was paranoid it would fall down and I don’t want to expose myself to the world. Then I sewed some 1/2 inch elastic to the waist of the trousers and then sewed the top to the elasticated trousers.
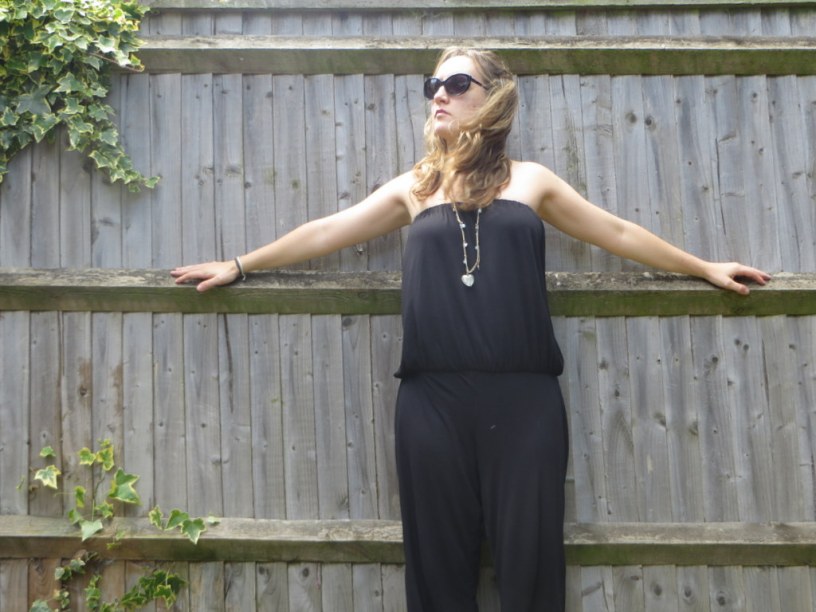
And here we go:

San Tropez here I come!
Not too far off the inspiration photo if I do say so myself…I look like one of those glamorous people on holiday that I always wish I looked like, but instead I’m in a pair of shorts and have sunburn.

West Berkshire’s next top model?
Turns out everything is plenty baggy enough

Too much material!
There’s also a LOT of material in the back. I gathered the top evenly on the back and the front, but there’s a lot more front to me than back which makes it pretty baggy in the back. I think I’m going to unpick the top and take a chunk out because surprisingly I actually like this outfit. It’s dead comfy and actually on trend. The day I took these photos, I met 2 other people in jumpsuits at 1 party! Also turns out I probably should have taken another inch off the waist elastic as it has a tendency to sit closer to my hips than my waist, so I’ll do that and take the chunk out at the same time.
Of course, I needed the obligatory jump – wahey, nothing fell out – good old inch elastic!

Whoa ! Too close
Don’t ya just love a self timer?? So I decided to jump off the bench at the end of my garden instead so that my whole body would be in the shot

Not the most flattering face
Yes I don’t look good and yes I’m not jumping, that’s because……

Oops!
My foot went through the bench!
But despite the slight bench related mishap (there’s a lovely bench in Sainsbury’s that I really wanted to buy but couldn’t because I alreaday had one, so maybe this was a blessing in disguise) I had some fun with this, and once I’ve made my adjustments I have something that I’ll actually wear this summer, something I never ever imagined wearing, so thank-you Chris 🙂
New Things I Did
1. Made a jumpsuit
2. Broke a bench
#JumpingintoJune
While I haven’t been writing anything, I have been sewing things and reading other blogs and that’s how I get myself in trouble….
Never in my life have I thought of wearing a jumpsuit – I’m 5ft2″ with an almost hourglass figure – jumpsuits are not made for people who look like me! So naturally, I thought it would be a really good idea to make one! I guess I’m just a little bit impressionable. It all started with a post that Chris made here. Then I looked on Pinterest (the most dangerous website ever) and then I ended up agreeing to join in!!
I have a couple of ideas in my head….
1. Jumpsuit/Catsuit – same difference right? I have patterns for leggings and patterns for leotards, so surely I can mix them together and create something from my lycra stash
2. Something summery and stretchy like this. Black jersey should hide a multitude of sins and I should be able to run this up on my overlocker without too much trouble.
3. This random creation that I found online except that I can’t decide if it’s genius or ridiculous.

So what do you think?
Learning to love lycra
So after I bought the overlocker (with the express intention of sewing more sportswear), I found funkifabrics.
This was very dangerous, suddenly there were loads of pretty patterns in front of me that I could make sportswear from. Seriously, go to the website, it’s like crazy Lycra heaven! I picked out a few patterns and fabrics and got some samples to see what the thickness was like. After all, no-one needs to see your pants through your leggings when you’re hanging bum first out of a hoop!
After convincing my friend Jo that she wanted to practice sewing with me, I went to make an order…it’s not the cheapest website by my standards (fabric land and the £1 pile at the market being regular jersey haunts) so I needed to make sure I had someone to share the extra metres with. And while making the order I found that they had an ebay outlet that sold remnant boxes…. Oh the temptation…the order could wait another day….
A slow work day later and I logged on at the exact time a box was listed. Who can refuse an 11kg box of lycra rems? Well, clearly not me, so all plans for pretty patterns were abandoned in favour of a mystery box of things that would stretch! And just for scale purposes, that’s a 2 litre bottle of water!

Yes that’s what 11kg of lycra looks like!
A couple of new jalie patterns completed the shopping spree.
Now I can make a lot of sportswear 🙂
Happy Christmas to me :)
Here is my Christmas present. Yes I do realise Christmas was a while ago, but this post really sums up why I’ve not had much to post about…I mean, I’ve had a whole new world of sewing familiarise myself with and it hasn’t all been wearable!
Last year I was going to buy an overlocker, but instead I accidentally broke my mum’s sewing machine (which was older than me and died naturally of old age) and had to buy my own. I still feel guilty about this….
But yay! Overlocker!

Another lovely next day delivery from Sewing Machines Direct and another bargain by getting their own SMD branded Janome instead of the regular high street version. Lots of free threads (another set of scissors)

Pretty seams
Look what it does – it makes pretty seams….I am SO excited about this!!
I even tidied up my sewing desk and put up some shelves because I need to be more organised now that I have 2 sewing machines….

Oooh pretty desk
New things I did:
1. Bought an overlocker
2. Used an overlocker
Doppler Effect Hudsons
I’ve just logged in and found 5 posts that I clearly didn’t make live! lol….oh well, time to update and make them live!
These are my seconds pair of Hudsons, from Perfect Pattern Parcel #5 The last pair ended up being really comfy to wear for hoop, but I made the waistband a little bit big – I also wasn’t convinced by the style.
I got this great (if somewhat thin and without great recovery) jersey in the £1 pile on Reading market. The stripes start small at the edges and end up wide in the middle. I thought this would be great to play with on a skirt but didn’t have a pattern, so I decided to attempt to make a cool effect on trousers.

Ooh Stripes
I set the pattern out so that I’d have the narrowest stripes at the front, and slowly getting wider as they went around my body. This was the easiest to pattern match as the back doesn’t have to be perfect.
I used some scrap narrow stripes on the pocket edge so that they would stand out and some scraps of white jersey on the cuffs and waistband. Once again, I omitted the drawstring waist – the smoother the lines, the less there is to hurt yourself on while you’re moving through the hoop.

Many compliments when I wore them to both my hoop and tap dance classes – 2 completely different people mentioned that they reminded them of the doppler effect, and so they were christened.

In the months since I made them, they made it to a few hoop lessons. Then for some reason that I couldn’t remember, I didn’t wear them for a while. I fished them out for a tap class and halfway through remembered why…that lovely thin jersey with terrible recovery had split up the back seam during hoop class. I had my own air conditioning for tap class 🙂
Challenges…
It’s been a while since I posted – which is weird really because I’ve been thinking about sewing and challenging myself and actually sewing loads.
So there are loads of different challenges knocking around the internet and I could join in with them, but I’m not exactly good at finishing things! One thing that caught my eye was #SewMyStash I mean, clearly I won’t get around to posting loads of pictures on Instagram (I don’t have an account) but I definitely need to cut down on the amount of material and patterns I have. Another source of inspiration was Flekka Challenge which develops a block into a whole host of different items of clothing. And with that – I’ve set myself a couple of challenges.
Challenge 1: Sew my way through this lot….

Piles of material!!
First things first, I sorted into material types. This showed me just how much jersey fabric I own, 2 of the piles were jersey (mmm, jersey, my favourite) and actually how much woven fabric I have bought, that I haven’t even attempted to sew.
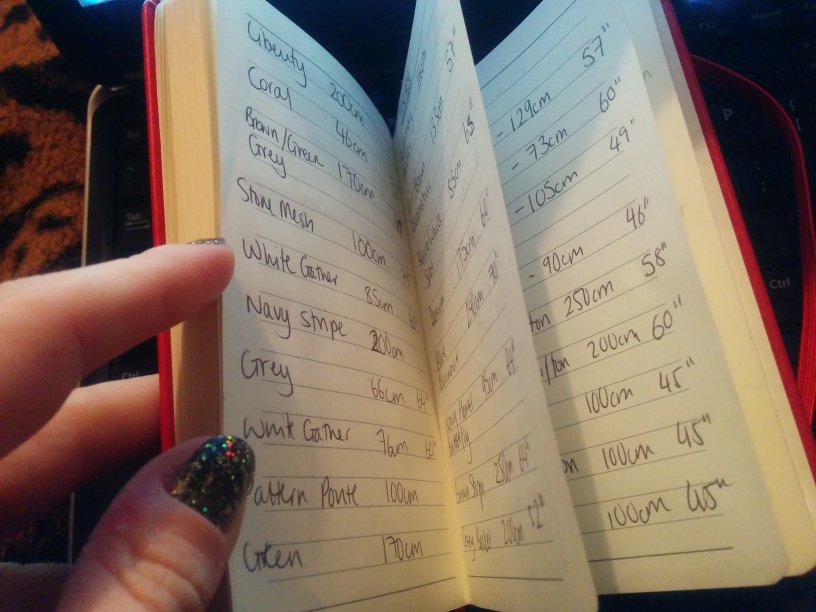
Folded neatly, I then logged everything in my little notebook.

Writing it all down makes it more real :-s
6,545 cm of material….OMG, that’s 65 metres of fabric (plus 1 yard of amazing vintage wool) not including scraps (and there are some pretty big scraps)
I’ve also got a rather large selection of patterns that I’ve never used. My aim is to match things from this stash with patterns that I’ve never sewn to see what happens 🙂
Challenge 2: Use those blocks!
Back in the summer, I went to a pattern cutting workshop and created my own bodice and skirt blocks. Roll forward 6 months and they’re on card but barely used. There are also a few metres of fabric purchased specifically for use with the bodice blocks for my own self drafted tops. These tops are still a figment of my imagination.
The challenge is to actually start using the blocks to create my own patterns. I’ve already tried making one skirt from the block, which showed me that it needed to be adjusted for my extra weight gain. I’m setting a target of 6 garments made from the blocks over the year. 3 from each block (and the skirt I made previously doesn’t count!)
My biggest challenge will be finding the time…..wish me luck!
Unwrapping the perfect pattern parcel
Well, I succumbed a while back to Perfect Pattern Parcel #6. I liked the cardigan mainly but for some reason it was the Hudson Pants that did it for me in the end. I have no idea why. They are an urban fit tracksuit bottom essentially and I am not urban and I don’t wear elasticated ankle tracksuits. Oh well…
Everything kinda came together on this one.
1. I went into town on a Wednesday for the first time in ages and got awesome patterned craziness in the £1 pile at the market. I’d actually gone to get some zips, but ended up with 5 remnants instead. The £1 pile is great, it’s usually sample pieces or bits with a shape cut out, but if you look carefully there are some good sized pieces (skirt or t-shirt size) plus for £1 it’s great practice material.

£1 pile haul...well a small selection
2. It was craft day (run by my friend in a local community centre), so I had a whole 7 hours to play around and a decent sized table to lay everything out on
3. I had to stay late at work so might have used the printer to print my pattern as mine is broken!
There’s not a lot to say about the construction. I cut a size 10, followed the instructions, got a bit confused on the pockets, read the instructions again, sewed some material and out came some trousers!

Ankle hanging in their full glory!
I omitted the drawstring cord (because I forgot to buy any and because it was impossible to sew a buttonhole in my fabric) and haven’t sewn the elastic to the waistband yet as I wanted to actually use the trousers first to see if the elastic needed adjusting (verdict, it probably does)

Does my bum look big in this?
They came to the studio the morning after creation and then to a tap class 2 days later (although I did get changed at work forget my trainers, so with heels I’m really rocking that urban look!)

I'm so street!
My overall thoughts are that they’re really comfortable but they’re not the greatest shape on me. It’s like wearing leggings with a baggy crotch, there’s a lot of material around that area and it feels weird. Everyone has complimented them though, so maybe the feel baggier than they look. They did work for trapeze and hoop though so I will be making more!
New things I did:
1. Pockets!
The Saskia skirt
A few weeks ago I had my day long craft day with friends. One of them (Saskia) gave me a bag of material that she no longer needed. It was perfect for practising skirts! And so my skirt was named.
The first thing was to dig out my blocks. When I made them, they were pretty much perfect so I figured I could go straight in and design a pattern

Blocks to pattern
I chose a leopard print brushed cotton from my new stash and traced off my blocks onto a2 paper. I didn’t want darts, just a waistband…a really deep one that was a design feature, not just a waistband.
I drew a curved line on the back panel at the bottom of the darts and a straight one across the front. Then I cut the pieces off and closed up the darts. Voila, my new skirt pattern.

Nice waistband!
I was really excited to sew it up, it’s the first pattern I’ve made from a block. I really wanted to pipe along the new seams, but I couldn’t find black piping anywhere in town (or black bias tape and cord) For the first time, I actually took time to press everything, my seams are all neat, my facing fits neatly, I even hemmed it by hand! I really wanted this to be something I’d wear.

Neatness 🙂
The back fits like a glove, the front, not so much. Unfortunately my little rounded cake belly is a little visible 😦 the material has bulges either side of my belly, it just needs a bit removing. If I’d kept the darts, I could have lengthened them, but because I moved them there’s really no alteration.

It’ll work fine with a longer jumper or T-shirt over it, but tucked in, I’m just not comfortable with the bagginess around my belly.

Bad belly

New things I did:
1. Made a skirt
2. Made a pattern from my skirt block
3. Hemmed something by hand
4. Learned I need to increase the front dart length on my block!
